Quick Links
InBaldur’s Gate 3, players will likely find themselves seeking out the Goblin Camp sooner or later, especially if they want to save the Tiefling Refugees and track down the lost druid Halsin. Players will also want to pay it a visit for the useful loot scattered throughout.
InBaldur’s Gate 3, players will eventually want to pay the Goblin Camp a visit if they want to find out more about the Absolute and the Mindflayer Tadpoles. Whether clearing the camp or lending a hand as they invade the Druid Grove, taking the time to explore the Goblin Camp properly is well worth the effort.

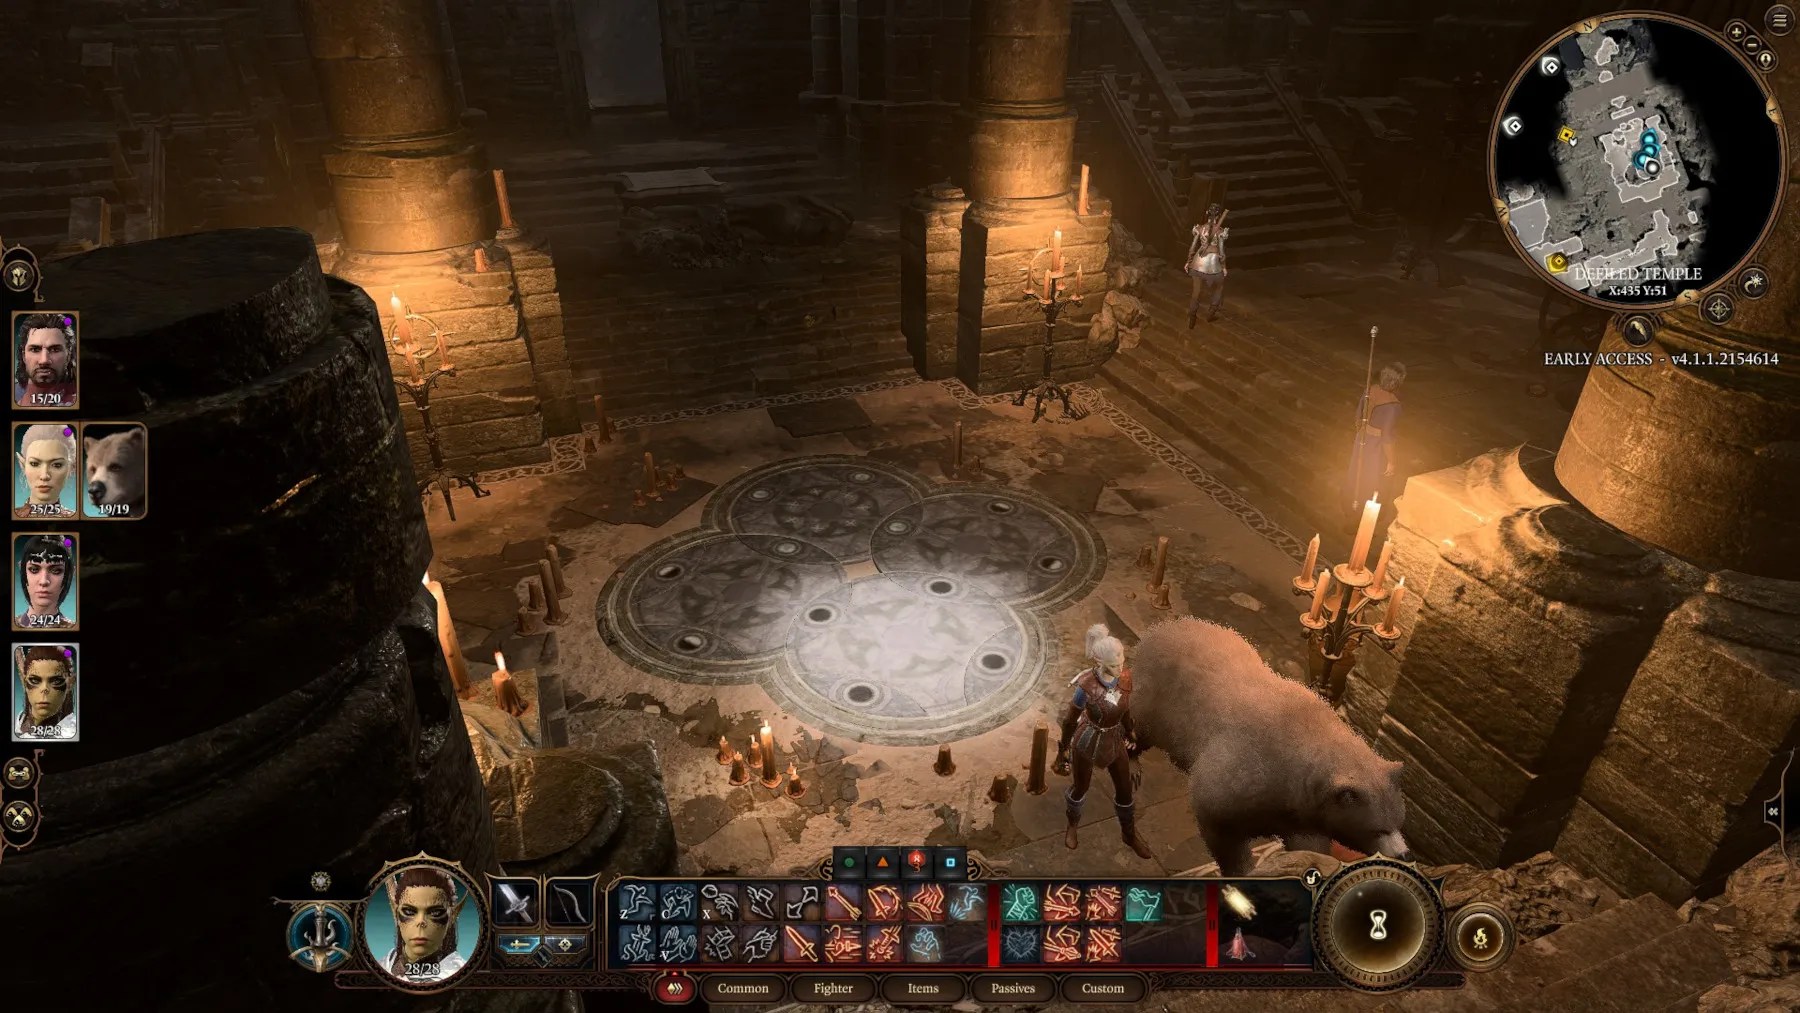
Updated on July 25, 2025, by Nahda Nabiilah:After completing some of the tasks in the Emerald Grave, whether you decide to side with them or not, the next destination should be the Goblin Camp. The area has many layers, and it’s rather complicated to navigate, since there’s the general camp, the Shattered Sanctum, and most importantly, the Defiled Temple, which leads to the Underdark. Exploring each layer yields many rewards as well asnew additions to the camp in Baldur’s Gate 3 such as Voloand the Owlbear.
Updated on May 27th, 2025, by Thomas Hawkins:
Where To Find the Goblin Camp In Baldur’s Gate 3
Players wanting to visit the Goblin Camp will need to head west after exiting the Emerald Grove (from the main gate where the Goblin attack happened), continuing through the Blighted Village, and out the other side to find the Goblin Camp on the western edge of the map.
Getting inside might prove a bit tricky, thoughif players decide to break Sazza out of prison at the Emerald Grove, she’ll talk to the guards and get the party inside. Otherwise, players will need to talk their way past the guard (likely having to smear Worg excrement on their face too), use their Tadpole to get the guard to let them inside, or fight the guards and try to stop them from raising the alarm.

Another method players can use (as illustrated in the video above) to bypass this encounter is by sneaking around the side of this first encounter and jumping around the side of the cliff. You can then use Feather Fall to cross over to the main camp without using the bridge, though the cutscene introducing the Absolute’s Chosen will still play as normal. (In the video we actually get spotted due to Astarion being badly positioned, but the principle is sound.)
The Goblin Camp Walkthrough In Baldur’s Gate 3
Speak With Volo
After passing the guards and making it into the Goblin Camp, players will notice Volo performing on stage. Interacting with him will, regardless of the player’s choice, result in him getting taken away by a Goblin. This is beneficial since it will allow players to rescue him later on, which allows you to get him to come to your camp.
Win The Chicken Race
A Goblin on the left of the entrance is talking about Chicken Chasing, and will invite the player to participate if they ask them about it.If the player has fought and slain the Owlbear in the area, but spared the cub, it will have eaten the Chicken and taken its place in the game. Players hoping to win this game will either need to move precisely to nudge the Chicken/Owlbear to the goal, or use “Speak with Animals” to convince it to run to the goal on its own.
You can also trigger the Owlbear version of the Chicken Chase Minigame by visiting the Owlbear Nest, speaking to the Owlbear and leaving without a fight (requires Animal Handling Skill or aSpeak with Animalsspell/potion), and then taking a long rest. This will cause the Owlbear to be killed by a Goblin Raid and cause the Owlbear Cub to appear at the Goblin Camp.

Either way, winning Chicken Chasing is a handy way to make a little extra gold. With that handled, players should head to the eastern part of the camp to find a Waypoint, making return trips to the Goblin Camp much easier. There is a Goblin named Crusher here bragging about his exploits, and players can intimidate him to score some points with Lae’zel. Killing him instead allows players to get “Crusher’s Ring,” granting +3m movement to the wearer.Players who selected the “Dark Urge” originwill have a unique dialog option here where they can bite Crusher’s toe off, though this will not allow you to get the ring unless you then kill him.
Another way to get Crusher’s Ring, with fewer people around to cause trouble, is by embarrassing Crusher by triggering the fight with him and then making him kiss your feet. He will then relocate to the bridge leading into the Goblin Camp, where you can kill him in an isolated location to grab the ring.

Stimk And Booyahg Piddle
Players can head past Crusher and climb up to the upper section of the camp, where they can find “Stimk.” Failing at talking down Stimk (DC: 15 Deception Check) will lead to a very difficult fight. After getting past Stimk, players can find a Gazebo where “Booyahg Piddle” is reading a book. Players can convince them to hand over the book, earning Shadowheart’s approval in the process, by passing a DC: 10 Intimidation orPersuasion skill check. Players can also use Illithid Wisdom to force them to hand it over.
Once players are done exploring around here, it’s time to head inside via the main door at the north end of the camp. This leads to the Shattered Sanctum.

Alternatively, players can break the wall behind the sleeping Goblins and Hobgoblins on the upper level to enter the Shattered Sanctum from above and sneak inside. This is especially useful if you want to raid the room filled with explosives and don’t want to distract Roah Moonglow and her allies who are guarding it. Trying to break the wall will wake up the sleeping goblins, triggering the aforementioned dialog with Stimk, and trying to break it again after passing the check will trigger the fight, so be prepared if you couldn’t break it in one strike.
The Shattered Sanctum Walkthrough In Baldur’s Gate 3
How To Get Past The Guards
Entering the Shattered Sanctum,players will likely trigger dialog from Shadowheart if she’s in the party.After she’s finished expressing her distaste at being in the (ruined) Temple of Selune, players will be able to head a little further in, triggering dialogue with the guards. Players can use a variety of charisma-based skills to get past the guards, though Drow will get waved on through without a second thought, and Sazza will talk the guards into letting the party past if she’s there. you’re able to also try fighting the guards, in a tricky but entirely manageable fight for a level 4 party.
Priestess Gut
Past the guards, players will see Priestess Gut straight ahead. Speaking to her offers the chance to get branded with the “Mark of the Absolute,” which will help them to more easily trick cultists into believing the party is on their side. She’ll also offer to help the player with removing the Illithid Tadpole behind their eye.
Warlock Greez, standing near where Priestess Gut is initially found, will offer to brand anyone who speaks to him once Priestess Gut has left the room. This allows you to brand multiple party members if desired, which can be useful in multiplayer or if hoping to take advantage of equipment that requires the Brand of the Absolute to function.

Accepting Gut’s offer will have her invite the party to her Chapel, so they can discuss things in private. Once inside, players will have a much easier time assassinating her without interference, should they wish to. Taking her offer to remove the Tadpole and then going through with it is a terrible idea since she will attempt to drug the active character and, if successful, chain them up. Players will then have to attempt to escape, or rely on the help of Korilla, an assassin who will show up and deal with Gut. That said, allowing Korilla to take out Gut is a viable way of taking her out of comission without alerting the rest of the camp, which can be handy when playing in Honor Mode.
The Chapel Gut brings the party to a door leading to the Defiled Temple, which contains her bedroom and acorridor leading to the moon puzzle.Solving this puzzle will open a route into the Selunite Outpost in the Underdark.

Killing Priestess Gut allows players to retrieve her Illithid Tadpole, along with theAbsolute’s TalismanandAbsolute’s Warboard. The former lets the wearer cast aid once per long rest and also gives them an advantage in death saves, while the latter is a shield that allows the wielder to cast heroism and also gives them +1 for all saving throws if they have the Mark of the Absolute. She also has some useful scrolls and potions.
Players might want to wait until they’ve done everything else in the Goblin Camp before dealing with Gut if they plan to kill her. Failing to eliminate her on the first turn of combat will cause her to call for reinforcements, which could potentially spiral out of control and cause problems if the player isn’t done with the area.

Abdirak, Follower of Loviatar
Players can head to the right from where Gut was found to find where the Goblins are keeping one of the captured adventurers. There’s also a follower of Loviatar here, named Abdirak,who can grant the buff “Loviatar’s Love” to a characterif they withstand his torture three times and succeed at the skill checks. Loviatar’s Love will provide a +2 bonus to attack rolls and saving throws when the character is below 30% of their max hit points. This buff will linger until the character dies, so you may potentially keep it for the entire game.
Free Liam
Players can speak to the Goblin torturers in the room to the right of Abdirak’s room to learn that their interrogation isn’t going well. A successful deception skill check can get them to leave, and Drow can skip the skill check altogether. You can also utilize the Illithid Tadpole to order them to leave, which is a pretty easy Wisdom check. Speaking to the prisoner will allow players to get information about what the adventurers were looking for, and offer the opportunity to free him. Freeing him provides inspiration for any character with the Folk Hero background, which includes Wyll.
Free Volo
Once the prisoner has been freed or interrogated, players should head north past Abdirak’s room to find the room containing Volo, who is currently being held prisoner by one of the Goblins. Speaking to said Goblin, whose name is Gribbo, will allow players to try toconvince her to surrender Volo to them.Failing this, players can always wait for her to leave and pick the lock, or outright buy Volo from her if they have enough gold on hand. Volo will be grateful for the help and use a potion of invisibility to escape, but not before promising to join the group at their camp, whether they want him to or not. Further north from this room, on the right edge of this map, is the entrance to the Worg Pens. Players might want to handle the Worg Pens before they continue exploring this area, since it’s a fairly small diversion and there’s an important character to be found there.
Minthara
Players can head to the left from the Worg Pen entrance to find Minthara, the one the Goblins refer to as “The Drow.” She’s planning the raid on the Emerald Grove, and will appreciate it if the party tell her where to find it. Alternatively, if Sazza was freed, she’d go ahead and tell her exactly where to find it, effectively making that decision for the player. If Minthara finds out the location of the grove, the only way to stop her from starting the raid in a day’s time (after the party has a long rest)is by eliminating her here.(Players can still side with the Emerald Grove and help them beat back the attack after the raiders arrive, of course.) Minthara is a fairly strong Drow Paladin, but players who don’t mind missing out on some loot can shove her into the bottomless pits near her location if they want to kill her easily.
Looting Minthara’s body earns some Spidersilk Armor,Boots Of Striding, andXyanyde. The latter is a unique mace that castsFaerie Fireon a creature when the wielder misses that creature with an attack. The Spidersilk Armor is an excellent light armor that grants +1 for stealth checks and an advantage in constitution saving throws. The Boots of Striding grant the wearer +1.5m movement while concentrating on a spell, but are medium armor and are therefore only useful to spellcasters capable of wearing that kind of armor. Players can also take her Tadpole and use it to unlock a new Illithid power.
Alternatively, siding with Minthara and helping her raid the Emerald Grove makes her recruitable later on, at the cost of making Halsin the Druid impossible to recruit. One final method of dealing with Minthara is by agreeing to help her raid the grove, and then entering turn-based mode as she crosses the bridge nearby. You can then shoot the bridge supports to make the bridge collapse, taking Minthara with it into the pit. This will, of course, mean losing out on Minthara’s loot.
Players wishing to recruit Minthara and Halsin in the same playthrough will need to enable non-lethal attacks and knock Minthara out. This will fulfill the requirements to defeat the Goblin leaders while leaving her alive to show up later in the game, making it possible to recruit her without raiding the Druid Grove.

Dror Ragzlin
To the west of Minthara isthe throne room of Dror Ragzlin, a Hobgoblin True Soul who is currently trying to interrogate a dead Mind Flayer from the Nautiloid by using a “Speak with Dead” scroll. Players can choose to let him get on with it, do a Wisdom check to hijack the interrogation or leave before the Mindflayer inevitably blows the party’s cover. Successfully hijacking the interrogation is a great way to gather more info, but players should be cautious about picking options that could tip off Ragzlin to their manipulations. Being too obvious, by picking too many of those options, can result in him starting a fight with the party.
Dror Ragzlin and his Goblin allies can be quite a tough fight, but positioning a rogue in the rafters above the room (by using the ladder) to rain death down from a safe vantage point will make things a lot easier. Players can also take advantage of the pit leading down to the spider pen to eliminate some foes with a well-aimed push. Ragzlin is a dangerous physical fighter who wields theFaithbreaker, a mace that deals an extra 1d6 force damage and can push targets back 5m. It’s best to either immobilize him while taking out his myriad minions or focus on him first to minimize the damage he can cause.
Players who want to trivialize Dror Ragzlin and avoid facing him entirely should make a detour to raid the explosives stash.This can be found next to Priestess Gut’s room, behind Roah Moonglow, and is most easily accessed by entering Shattered Sanctum from the upper entrance and jumping across the rafters to enter it from above. Steal all the smokepowder barrels in the room and relocate them to surround Dror Ragzlin’s throne. (Once you’ve hijacked the interroagation without triggering a fight with him, he’ll let you wander around freely.)
Once the explosives are in place,light them from a distance with Alchemist’s Fire, an Arrow of Fire, or a Firebolt cantrip, and you’ll take out Dror Ragzlin before he gets to act. Mop up his minions and it’s mission accomplished. This tactic is especially useful in Honor Mode, where Dror Ragzlin’s legendary action can give all of his allies an action surge, making him pretty terrifying if he gets the chance to act.
Defeating Dror Ragzlin allows players to claim Faithbreaker and his Illithid tadpole. Players can head up the stairs to the area behind his throne to find a treasure vault whose lock can be picked, though if Ragzlin is already dead, you may just use the key looted from his body.
Killing Dror Ragzlin will almost always result in making the rest of the Goblin Camp hostile, so players should exercise caution.
Roah Moonglow, The Merchant
The last noteworthy area in the Shattered Sanctum is in the southwest, near Priestess Gut’s Chapel. There is a merchant here named Roah Moonglow, who sells several useful items. This includes the Bow of Awareness, which gives a +1 bonus to initiative rolls, and the Blooded Greataxe, which deals extra damage when the wielder is below 50% hp. Behind Roah is a stash of explosives and a chest with a decent chunk of gold in it, so it’s worth breaking in. One easy way to get there without upsetting Roah and the other Zhentarim is by entering the Shattered Sanctum from the upper entrance (by breaking through a wall) and climbing across the rafters.
The Worg Pens Walkthrough In Baldur’s Gate 3
After entering the Worg Pens, players will quickly find some Goblins messing with a bear. Should players want to rescue Halsin the Druid, they’ll need to step in to help the bear. Players should take out the two Goblins who will run to get reinforcements as fast as possible, and then take out the rest of the Goblins and their worgs to save the bear.The bear turns out to be Halsin, who thanks the party and, if they haven’t already done so, asks them to eliminate the Goblin Camp’s leadership.
